Monday, February 24, 2014

More progress this weekend!

Things are starting to heat up here.  Got a little tease of nice weather so I tried to take advantage of it.  Parts everywhere, 10 million things to work on at in parallel, and never enough time.

Saturday I went down to Tech Shop - it's basically a community shop that you pay a membership fee to join, but you get access to all kinds of insane machinery for fabrication.  I took a powder coating class and brought some parts down to try out (probably too many, but hey).

I got all my powders from Powder365.com.   Seem to be of good quality based on my limited ability to judge.
  • Zinc based primer for rustproofing steel parts
  • Outgassing forgiveness primer - for use on porous aluminum castings that may have absorbed oil. 
  • Black magic - exterior / durable black
  • High temp black - for use on brake calipers and exhaust stuff if I feel like it.
  • AC silver - alternator housing and whatever else I feel like
  • Wrinkle black - engine covers
  • Starlight clearcoat - clear finish for exterior suspension components, make them more chip resistant.
 Parts were sandblasted first with ~100 grit aluminum oxide media in the blasting cabinet.

 
I didn't get any closeups but this media put a really nice finish on everything - even on the aluminum stuff.  No pitting or anything, though I increased the tip angle of the gun to prevent it from "digging in".  The texture would probably show through if I were painting it without a primer/surfacer but this stuff doesn't have to be absolutely perfect, just durable.  I'm not building a show car.


After washing the parts off, I gave them a prebake to get the moisture out and outgas any contaminants.  Once cooled off it was time to put some powder on them.


Then into the oven to bake.  Here's some finished parts.


Initially everything looked good but I noticed it was chipping much easier than it should be.  I suspect I either didn't give the metal enough time to get up to temperature in the oven (inadequate cure time) or I didn't clean them thoroughly enough.  Either way I'll be stripping and recoating most of the parts.  I was excited to get some things coated and rushed it a little bit, I think. 

Live and learn.

In other news, I also sold my S52/ZF transmission out of my M3 so I started pulling that out of the car on Sunday.

Figured I'd take some pics of the car before tearing it apart.  It's gonna be a while before it's back to this state.


Anyway, this is where I ended up at the end of the night.


Probably going to spend the rest of the week getting this pulled and packed up.  I have to put it on a pallet / box it up because it's going to Texas.

More to come in short order hopefully.

Sunday, February 16, 2014

I'd like to start this week's post by offering a giant middle finger to mother nature.  I'm trying to get shit done and it won't stop snowing.  Anyone who says global warming is a bad thing is a fucking idiot.


Despite my frustration, I made a bunch of progress on some random things this weekend.

Put the compression fitting on my power steering pump return line.  Originally it would have been just a slip fit hose barb but I wanted a solid -AN hose connection to help prevent leaks.  I hate power steering leaks almost as much as I hate winter and hippies.

Sanded the barb off until the fitting and ferrule fit.  A use a file / sandpaper for rough shaping, and a bearing scraper for final shaping. 


Exploded view of fitting.  I'm using an Earl's tube-to-AN adapter, PN# AT165006ERL.  The brass olive gets crushed and digs into the tube, locking the fitting in place. 


Installed.  I gave it a test by making a witness mark and pulling on it as hard as I could - it didn't budge.  I wouldn't trust it to anything of higher than 50 psi (which is the max they recommend) or with anything that could start fires (like fuel) but it should work fine for a power steering return.
 

Also starting grinding away areas on my valve cover that could be potential interference points with my rocker arms.  I'll be running thicker gaskets as well, but it was still a little close for comfort based on what I could see.  I don't want to risk making contact, so I'm taking precautions.  I removed the baffles and will be grinding away most of the associated casting.  Unfortunately I couldn't do this very long because my compressor was sending so much water through the line that I was afraid it'd damage my die grinder.  Again, fuck winter.


Still to do.  Left behind are the rivet bosses the held down the sheet metal baffle / splash guard.  I'll be running a catch can so I'm not concerned about any oil that might make its way out of the valve cover.


 Also worked on some alternator parts.  Cleaned the stator and sprayed it with some Dolph's EB-41 electrical insulating enamel.  Takes any electrical part from zero to badass in a matter of minutes! 


Also sprayed my ignition coils with it.  It took longer to mask them off then it did to spray them.  And unfortunately for me they don't photograph well.
 

Tinned up the coil leads, and also soldered the rectifier and diodes together.  Laid it all out on the housing first to make sure I had it in the right position.  Great success.


I also pulled the heads off tonight to check on the cylinder bores and reapply some oil to keep rust away.  Everything looked good.  

I also labeled all my pushrods to reflect their individual valve assignments....with 9 different lengths there's a lot to keep track of.  Happy to say my measurement tool was dead nuts accurate to the measurements I took ~ 3 months ago.


I also pulled the intake manifold apart to fix the paint on the top shell - the paint cracked when torquing it down despite my efforts to prevent that from happening.  Next time I'm going to experiment by adding some felt washers underneath to hopefully serve as a "thrust bearing" of sorts.  My brief testing showed that the felt washer remained stationary while the bolt / washer spun as I tightened them....which is awesome.  Some black fabric dye and they'll be good to go.


Parts everywhere.  Standard.


I know where everything goes.  I promise.


Saturday, February 8, 2014

Parts are continuing to roll in.  Let me start off by saying that I hate the iphone camera.

Power steering stuff is all here:
  •  Turn One power steering pump + orifice
  •  -6AN Russell power steering hose and fittings
  • Fragola -6AN weld bung
  • M14X1.5 to -6AN rack adapter
  • Earl's 3/8" to 6AN compression fitting (for use on reservoir return)


Oil cooler stuff is all here from Improved Racing:
  •  Setrab 925 rad
  • -10AN braided stainless line
  • -10AN Raceflux fittings
  • Improved racing oil cooler adapter w/ built in thermostat.


Clutch hydraulic stuff is all here:

  • Tilton 77 master cylinder - 7/8" bore
  • Wilwood 4 oz remote reservoir kit
  • 9/16-18 to 3/8" barb fitting and 9/16" copper crush washer for the master supply port from Sweet Performance (took me for fucking ever to find these parts.  nobody makes them)
  • 3AN braided stainless line and fittings from Pegasus (to slave cylinder)
  • 3/8" EPDM supply line from reservoir
  • Speed bleeder line for slave cylinder (not pictured)


Figured it was about time I starting figuring out if any of this shit is going to work.


The Tilton M/C is obviously not a BMW part, so I need to adapt it to my pedal assembly.  Luckily for me I still have the pedal assembly out of the 325i to do the mockup on.


I made up a bracket out of aluminum - not really sure of placement yet, though.  I don't know how much firewall clearance I'm going to have, so the master might have to rotate down to swing out of the way to make some additional room.  To prevent interference problems between the pedal and master cylinder at that point, I'm going to need to extend the rod end on the master shaft out.  This will also move my engagement point up, which I'm not sure if I'm going to like.  I have all the dimensions / bore sizes / fluid volumes / distance + forces required to disengage the clutch to play with - but this is one of those things where doing the math won't really help me because I don't know where exactly the master can be positioned yet.  On the bench I don't have a firewall to contend with, and that doesn't do me any good.

Even though the master has a rod end on either side giving it a lot of flexibility to move as it needs to, I'd like to keep the bore of the master as parallel to travel as I can to minimize wear.  Unfortunately this is probably as close as I can get to that condition.  Idk yet.

More to come.


Saturday, January 25, 2014

This week has been a relatively quiet one in terms of physical progress - but I've been doing a lot of research / reading related to other components for the swap.  To continue the coolant crossover work I need to get my collector manifold made, which I need a lathe to do.  I do not have a lathe, so that will have to wait.  I'm thinking about joining Tech Shop to knock out that and a few other projects, including some of the powdercoating that I want to get done.

I ordered my oil cooler setup and my power steering pump this week.

Oil cooler setup consists of:
  • Improved Racing cooler adapter / thermostat.  It maintains a minimum temperature of 180 degrees by diverting 90 percent of the flow until the oil is hot enough to be passed through the cooler.  Makes life on the street and on cooler days possible - no blocking off or uninstalling of the cooler is necessary. 

  • -10AN fittings and line.  Went with stainless line over braided nylon for improved abrasion resistance, given that the lines will be run relatively low on the car.
  • Setrab Series 9, 25 row cooler.  I settled on this based on glowing reviews from 'vette guys that road race their cars.  While I'll be on the upper end of their 400-475hp capacity for the cooler, I think for my purposes this will be plenty.  If I start tracking the car more and need more cooling capacity, then it will be easy enough to make the switch down the road.

 Power steering pump:
  • Turn One F-body pump w/ billet pulley
  • MFR-TUR11 -AN6 orifice / inline restrictor (bottom) w/ .093 orifice


LS pumps are notorious for overheating / squeeling / shitting themselves in general with performance driving.  This is due in large part to the fact that they flow all of the fluid required for steering assist by 900 RPM.  Anything above that introduces excessive heat into the system.

The Turn One pump alleviates this problem by reducing the flow volume to only what is necessary for steering assist.  The results are better heat regulation (improved pump life) and better steering feel throughout the engines operating range.

The orifice fitting / inline restrictor was chosen because I'm mating a GM pump to a BMW rack.  I have no idea what will feel the best given that the pump and lines are changing, so my plan is to drill out the orifice incrementally (starting at the smallest available size) until I get just the right amount of steering assist without feeling too light (overpowered). 


I also started tackling the electrical side of things more deeply.  Since tearing apart the engine harness I've identified a good portion of the pinouts and understand in general how everything communicates and gets its power.  The next step will be to understand how the BMW side did the same things, and how I can get the two sides to talk.  I started a powerpoint compiling all the different pinouts, tips, and schematics I've come across on the forums thus far.


Enough research - today I tackled the alternator in the name of getting all the parts ready for powdercoat that I want to powdercoat.  From what I was able to find on the interwebs, I believe this to be a Delco/Delphi CS130-D unit with a 105A output - though it says that nowhere on the case.


It was a relatively straight forward process thanks to some pioneering done by my buddy Fazz, but I ran into a slight hangup getting the stator coils out of the stator housing.  The OD of the laminations were a press fit into the housing, and corrosion had it locked in there pretty good.  Lots of surface area in contact to fight against.

To get it out, I applied a heat gun to the housing and rotated it slowly, spraying some WD-40 along the seam to help break things loose.  After it was thoroughly warmed up, I took a screwdriver/hammer combo (carefully) to the outer edge of the laminations though the vents in the housing and worked my way around the perimeter until it was out.  Really not the best solution I'll admit but it was really all I had to work with.  At first I tried reversing the jaws on my gear puller and hooking onto the inside of the stator laminations, but there really was not enough surface area to grab onto.  Inspecting it afterwards, there was really no damage to speak of.

I'll be borrowing an idea from Fazz and encapsulating the windings in Dolph's EB-41 electrical insulating spray-enamel.  I also found a rebuild kit on Ebay for this so I'll be replacing the bearings, brush holder and brushes, voltage regulator, and transformer/diodes while it's apart.  Should be good as new when I get it back together - hopefully it doesn't catch on fire.   

Sunday, January 19, 2014

A little more progress this week.

Coolant Crossover

Some parts and tools came in.  My flaring and bending tools arived....Ridgid 377 for 37 degree -AN flares, as well as bending tools from Eastwood.  The pliers suck, but the rolling bender works pretty nice.  Some of the bends I need to make are smaller than the minimum bend-to-bend distance this tool can do though, so not sure how I'm going to handle that yet.


The flaring tool works nice though, can support up to 3/4" tubing.  I haven't tried stainless yet though.


I then bought 25' of regular steel 1/4" line from the parts store and got to mocking up my lines.  I've redone these several times so far, but this is the best I could come up with for the moment to come up with a rough shape.


The challenge here is that I need to make bends in close proximity to my terminations.  If I bend it first, I won't have enough line to put the flare on.  If I flare it first, I have no way of making the bend (without kinking the line) in the place I need it.  I was hoping the pliers would be able to do this but they make marks on the line wherever they're in contact with it.  More research to do on this.  If it doesn't work out I'll just run braided lines and call it a day.  Need to make my manifold block before I can do much of anything though.

More parts...

Yes, more parts indeed.

Plumbing stuff to make my power steering, fuel, and coolant steam vent hoses when the time comes.


Electrical

Also decided to start digging into the wiring harness.  I completely de-pinned the PCM connectors and tore apart the wiring harness, connector by connector.  It's really not that complicated as most of the "snake" are common hots and common grounds.  The confusing part will be in figuring out which pin to send each sensor signal to, as grounds and low references get the same wire color (smart).

Here's where it started way back when:


 Here's what it is as of tonight.  The multimeter is pictured to make it look like I know what I'm doing.


 Next step will be to label each pin and get designations for each wire.

It will be rerun and tied together on the engine stand to make for the cleanest routing I can muster.

Tuesday, January 14, 2014

A little progress tonight..

I've been amassing pieces / fittings for a steam vent crossover for the engine.  1/8" NPT to -4AN adapters that thread into adapters that bolt into the block.  I have two tight spots on the front driver's and rear passenger's side that will need addressed.  Not sure how best to handle it yet.  The problem is exacerbated when the intake is torqued down and I don't want to risk developing cracks in the intake (plastic).


This spot on the passenger front of the block has just a straight adapter that will get a manifold block that collects all the lines individually before being sent out to the rad / expansion tank.


I intend to machine that myself, but here's a cross section of what that will look like...3 inlets and one outlet to the rad (upper right).


Also got a few more parts in.  Russell fittings for my fuel filter / pump to adapt to my -AN hardlines, along with a Borgeson DD telescoping steering shaft and one of my Flaming River chromoly u-joints.  I'll be building my own lower profile steering shaft to enhance header clearance and also to withstand the heat better.  The stock shaft has a rubber rag joint that would be nested in the driver's side header.  Waiting on the other u-joint, but will need to measure before I trim it to length.


Friday, January 10, 2014


Throttle Cable Bracket Mockup

Made a little progress tonight on a throttle cable bracket. 

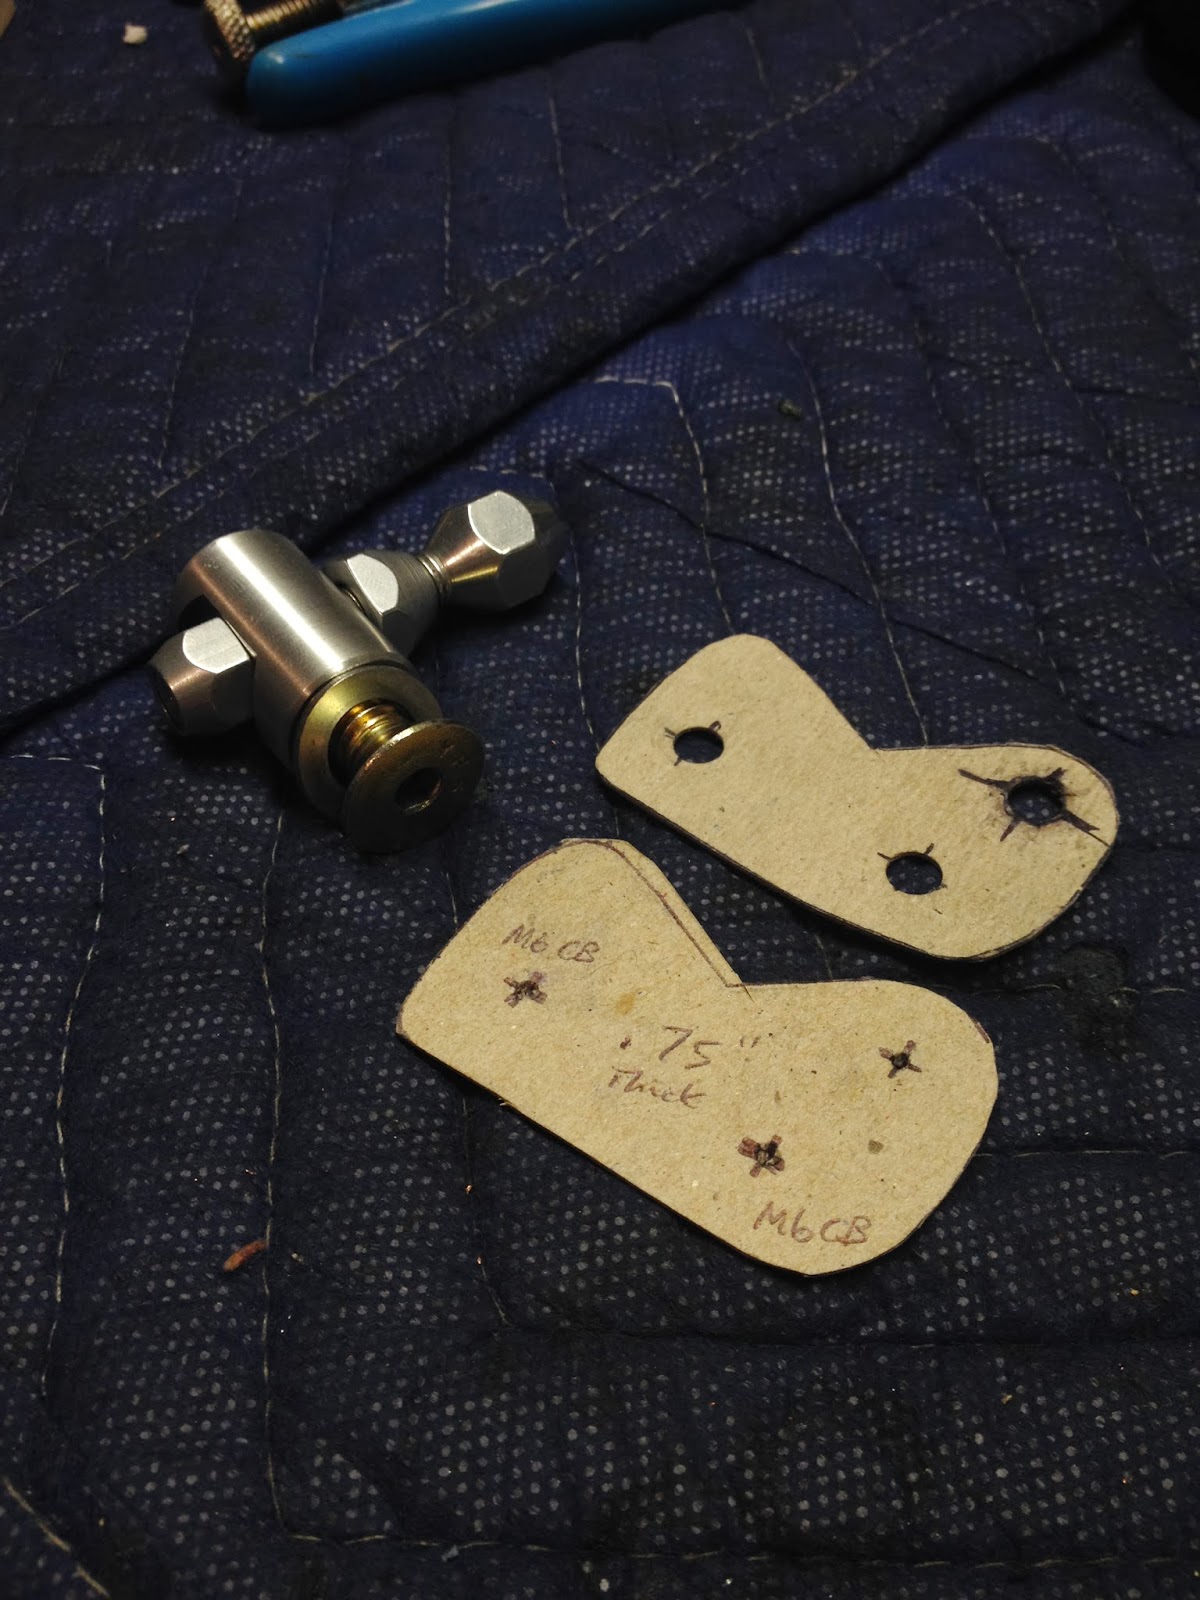
The stock F-body bracket doesn't fit the FAST 102 intake I've got, and neither does the Lokar LS1 bracket.  Both have the cable entrance positioned basically where the intake port for cylinder #2 is.  In addition to this, the cable position is too far inboard to be in line with the cam on the throttle body.  So the whole thing needed to move up and out relative to the intake.

This is the offending subject.  The post is secured with a countersunk screw from the backside, which I removed.  The flat bracket portion is what I'll be replacing.


 I started by taking a piece of copper wire and wrapping it around the post of the bracket, bending it up until I got it positioned where it needed to be.


Then took a tape outline of the mounting surface of the intake and transferred it to cardboard (still roughly shaped at this point).


Checking clearances - tight around whatever the fuck that tube is on the throttle body, as well as the MAP sensor on the intake.


Needs to come out from intake mounting surface by about about .750" to line up with throttle body cam.


Finished-ish shape with hole locations marked.  Plan is to make it out of aluminum and powder coat it to blend in with the intake manifold.  The post will be left bare aluminum (I think).


RIP Blackie - 09/1994 - 1/10/2014


It was a bittersweet kind of day - I got home from work just in time to see my old friend take one last ride.  RIP Blackie.  See you in the next life.